

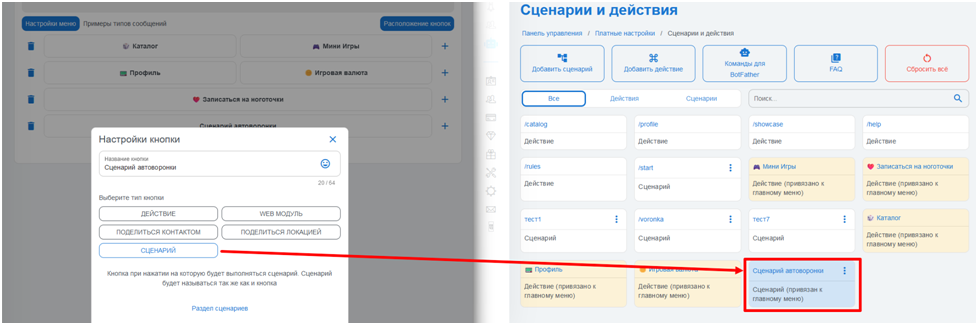
 Setting up an automated funnel using scenarios is a fairly flexible system; you can configure message sequences for absolutely any scenario and menu button.
Important! If the funnel scenario is triggered by pressing a menu button, the scenario and the button must have the same name (when creating a menu button with the “scenario” type, the scenario automatically appears in the “scenario management” button!)
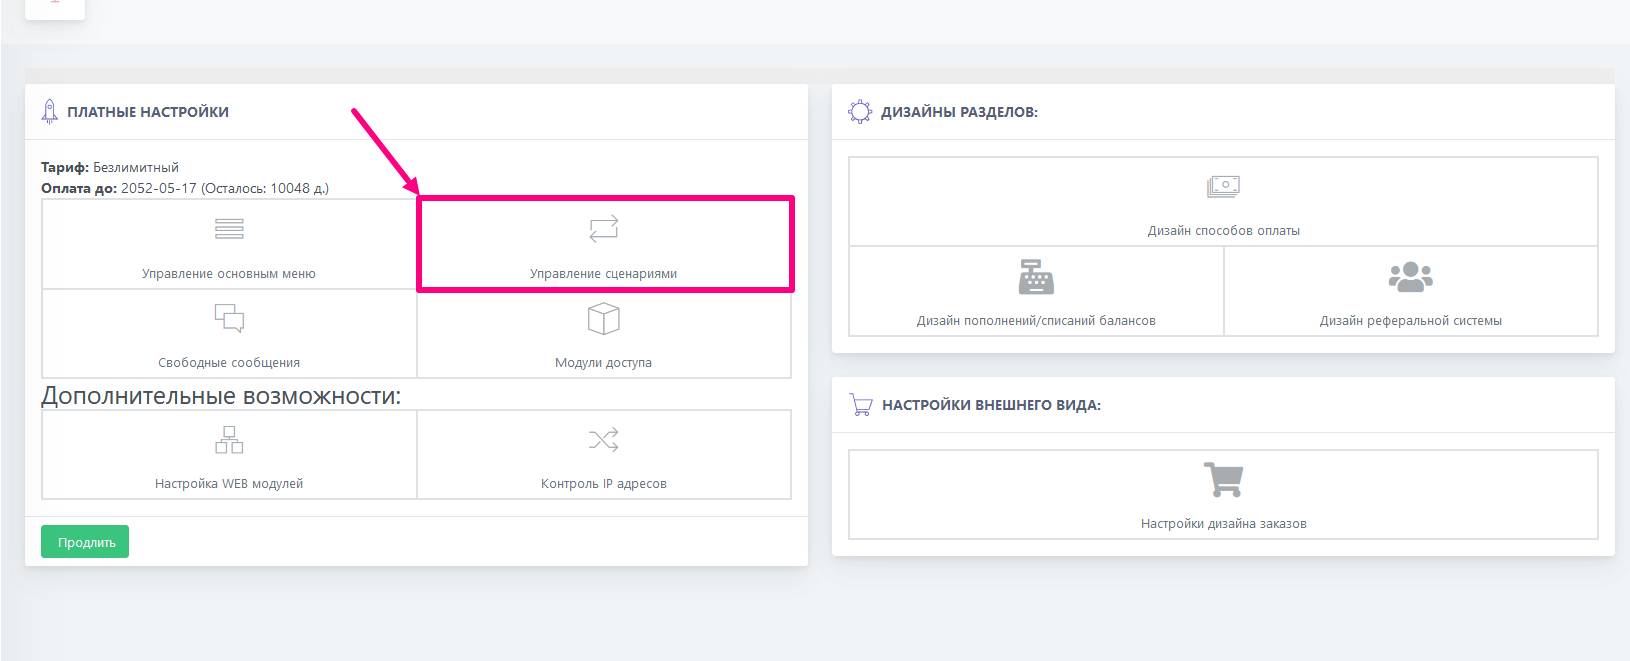 Let's move on to the “Paid settings” section and select “Scenario management,” we'll use the “/start” scenario as the basis for launching the autoresponder setup, since every user interacts with this command when they first start the bot.
 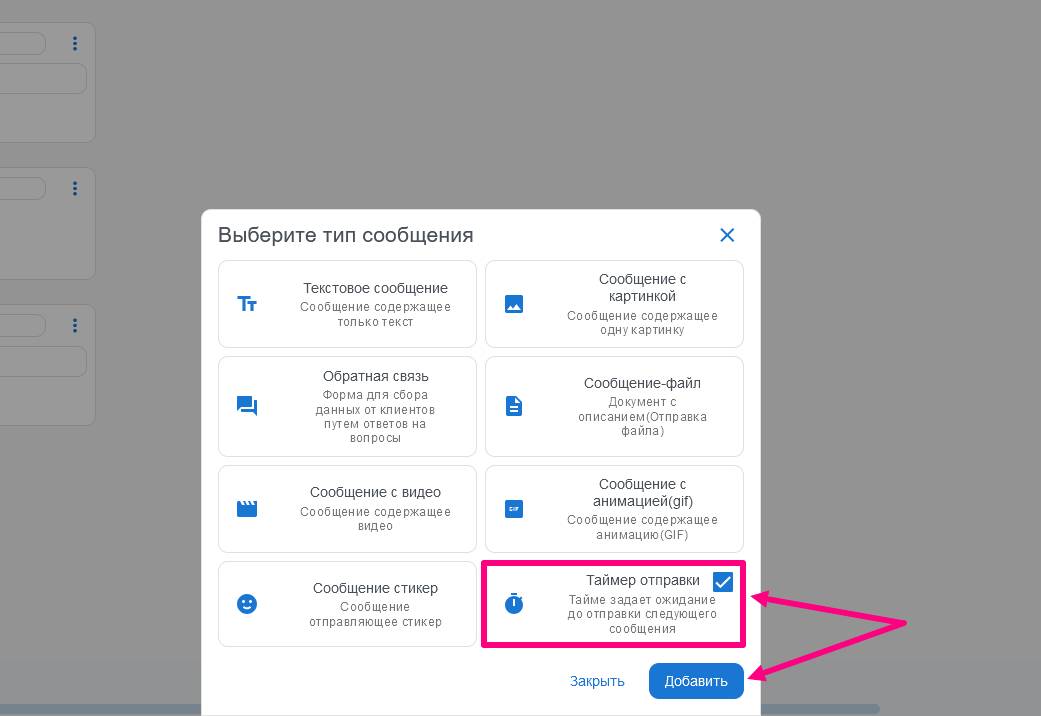 The first message in the sales funnel will be a welcome text; the next step is adding new messages, which is done by clicking the “Add message” button.
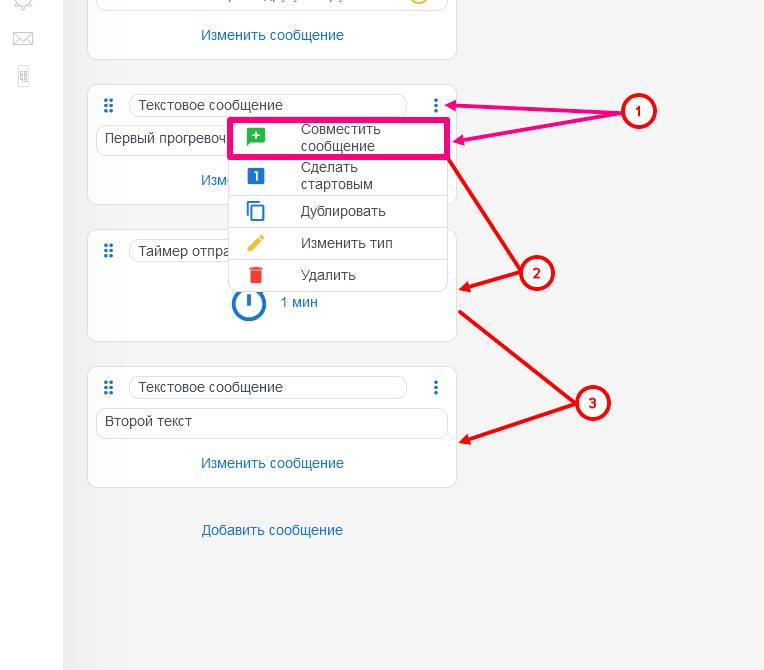 After you create the messages and set the sending timer, connect them to each other by clicking the “three dots” on the message with text and selecting “Merge message,” connect it with the timer message, and in turn connect the sending timer with the second message with text.
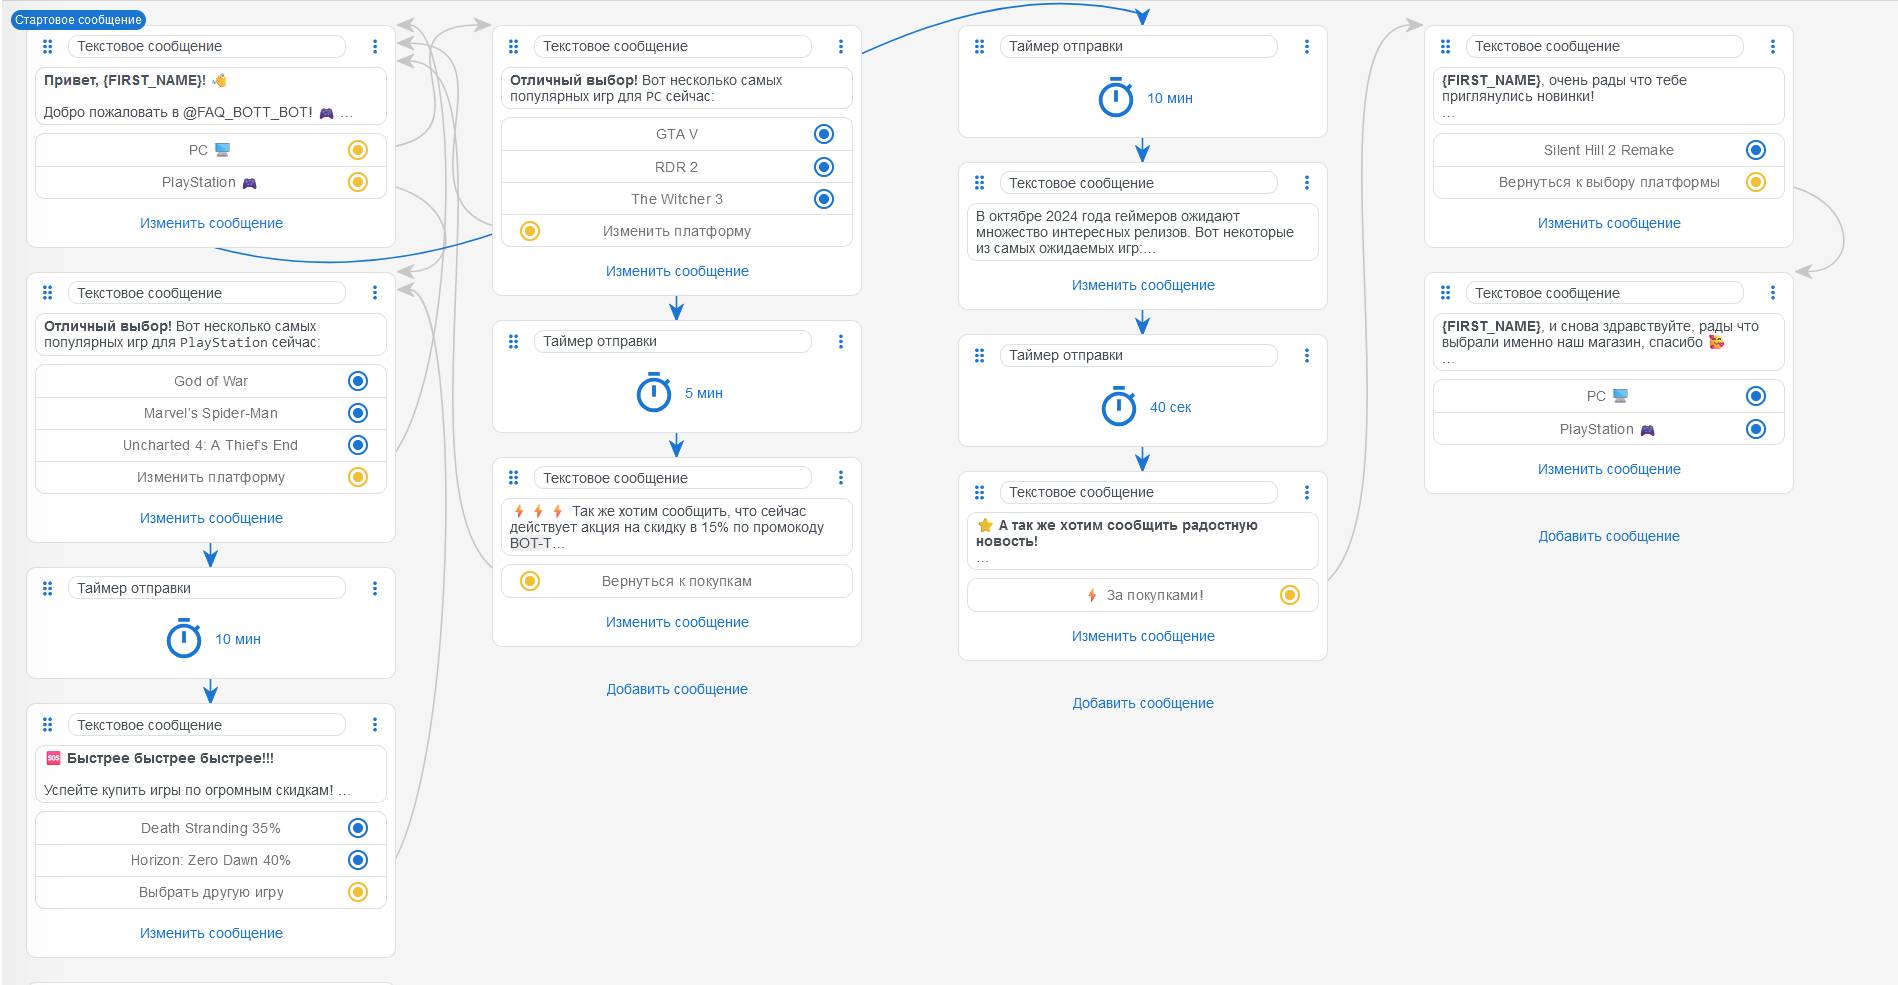 Ultimately, we will get a properly configured autoresponder funnel consisting of a sequence of messages with delivery after a specified time using the “Send Timer”.
 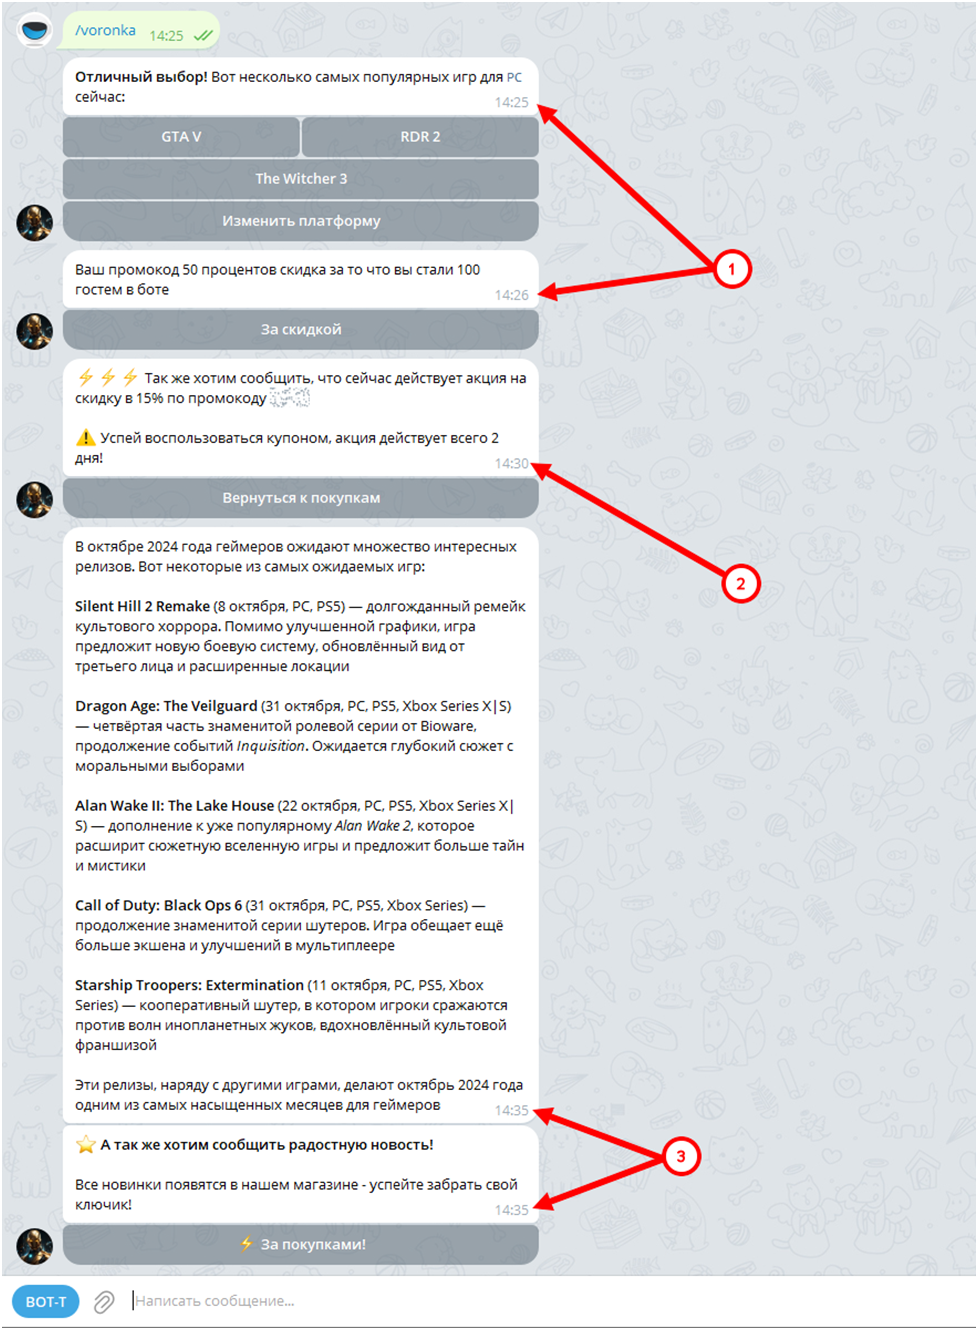 In the screenshot, we can see that the potential customer stopped at choosing a product, but later did not take any action.