

 Telegram channel application auto-approval bot is a bot designed for automatically approving/rejecting user applications in a specific channel. This type of bot can be useful for organizing customer support, conducting surveys, event registration, and much more.
The operating principle of an auto-approval application bot usually looks like this:
1. Bot setup: The channel administrator configures the bot by specifying the necessary parameters for handling applications (for example, accepting a user into the channel after completing a specified scenario).
2. User submits an application: The user sends a message with an application to the channel
3. Bot processes the application: The bot automatically processes the application; after an application to join is submitted, the bot sends a prepared message when subscribing to the Telegram channel, and it is also possible to configure sending a second message after a specified time.
Detailed instructions for creating a bot that sends a message after subscribing to a channel - https://www.youtube.com/watch?v=_sXdrazWTv4&t=493s
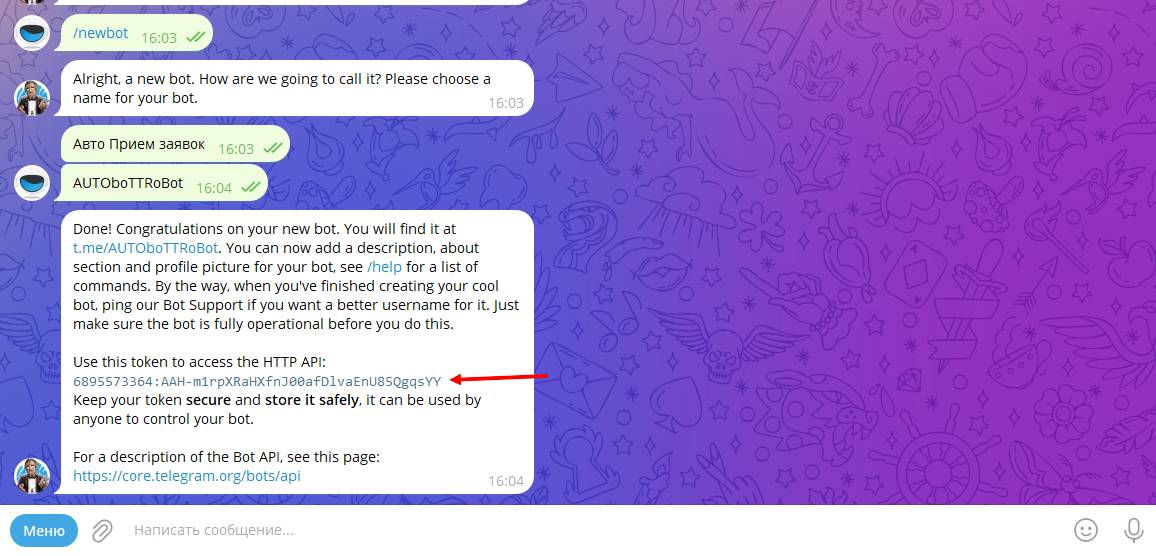 The initial stage in creating a bot for approving or rejecting requests in a Telegram channel will be to create/issue an API token in @botfather; you need to follow these instructions:
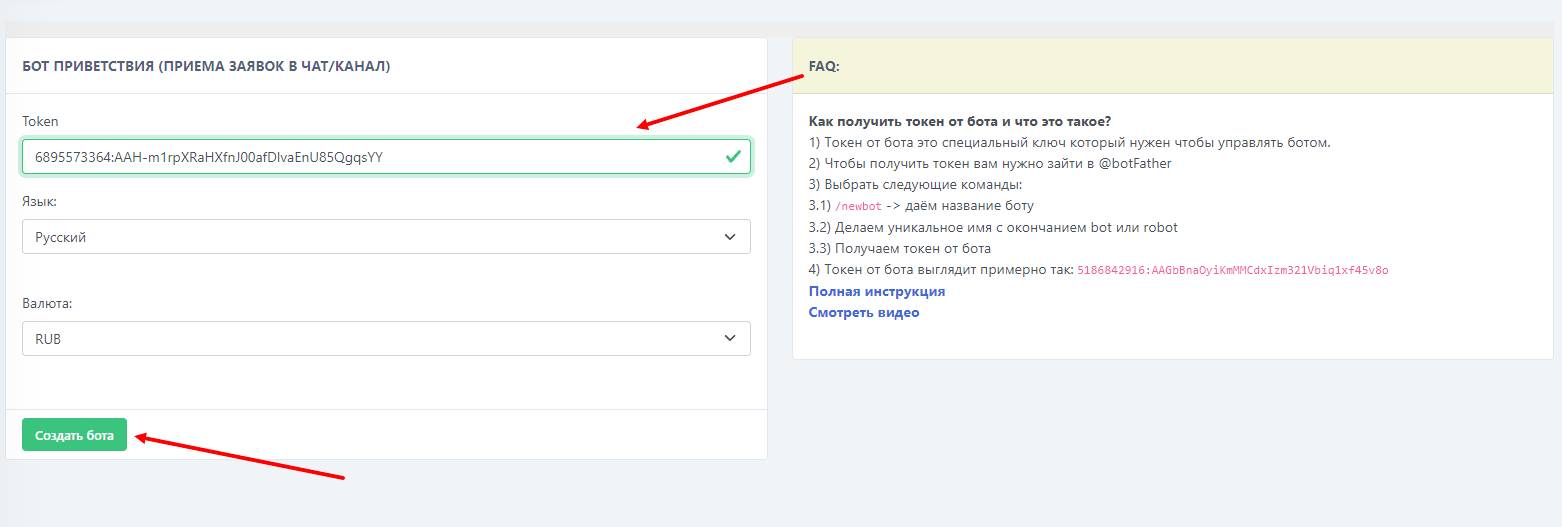 The next step will be to add the previously issued token to the BOT-T system by following the instructions:
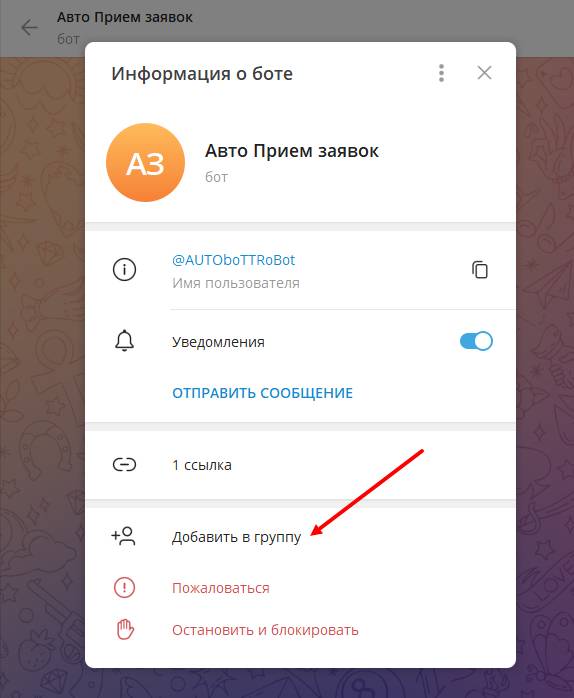 Next step - add the bot you created to the channel as an administrator. To do this, you need to go to Telegram, select your bot, and go to the settings. Then click the "Add to Group" button and select your channel.
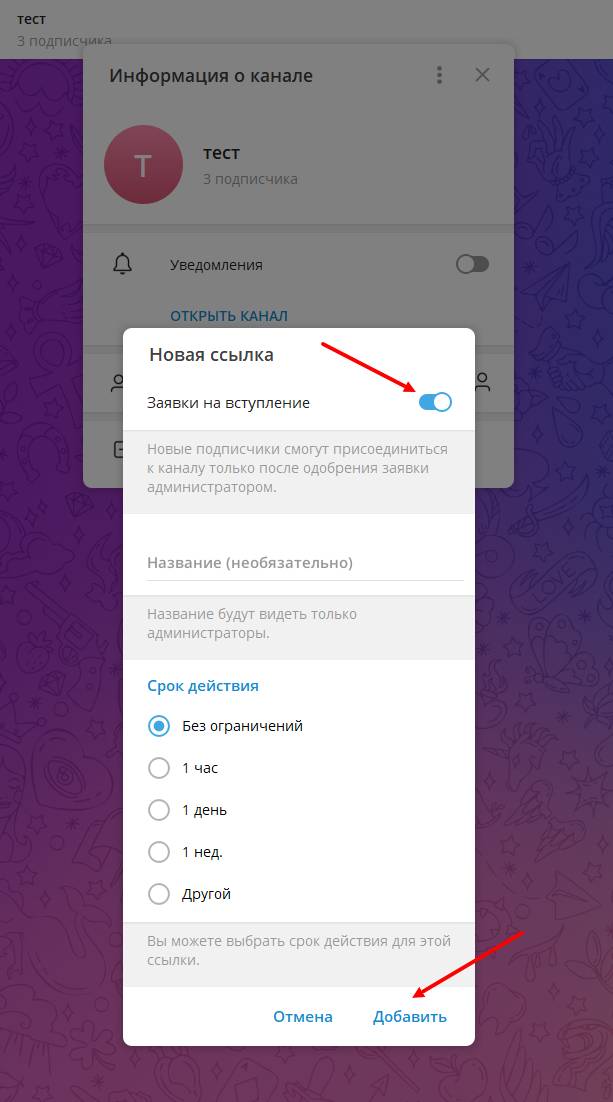 An important attribute is the distribution of the link with a request to join the channel. It is quite easy to create it: you need to go to your channel, click the "manage channel" button, select "invite links", then "create a new link" and switch the "join requests" toggle to the active state.
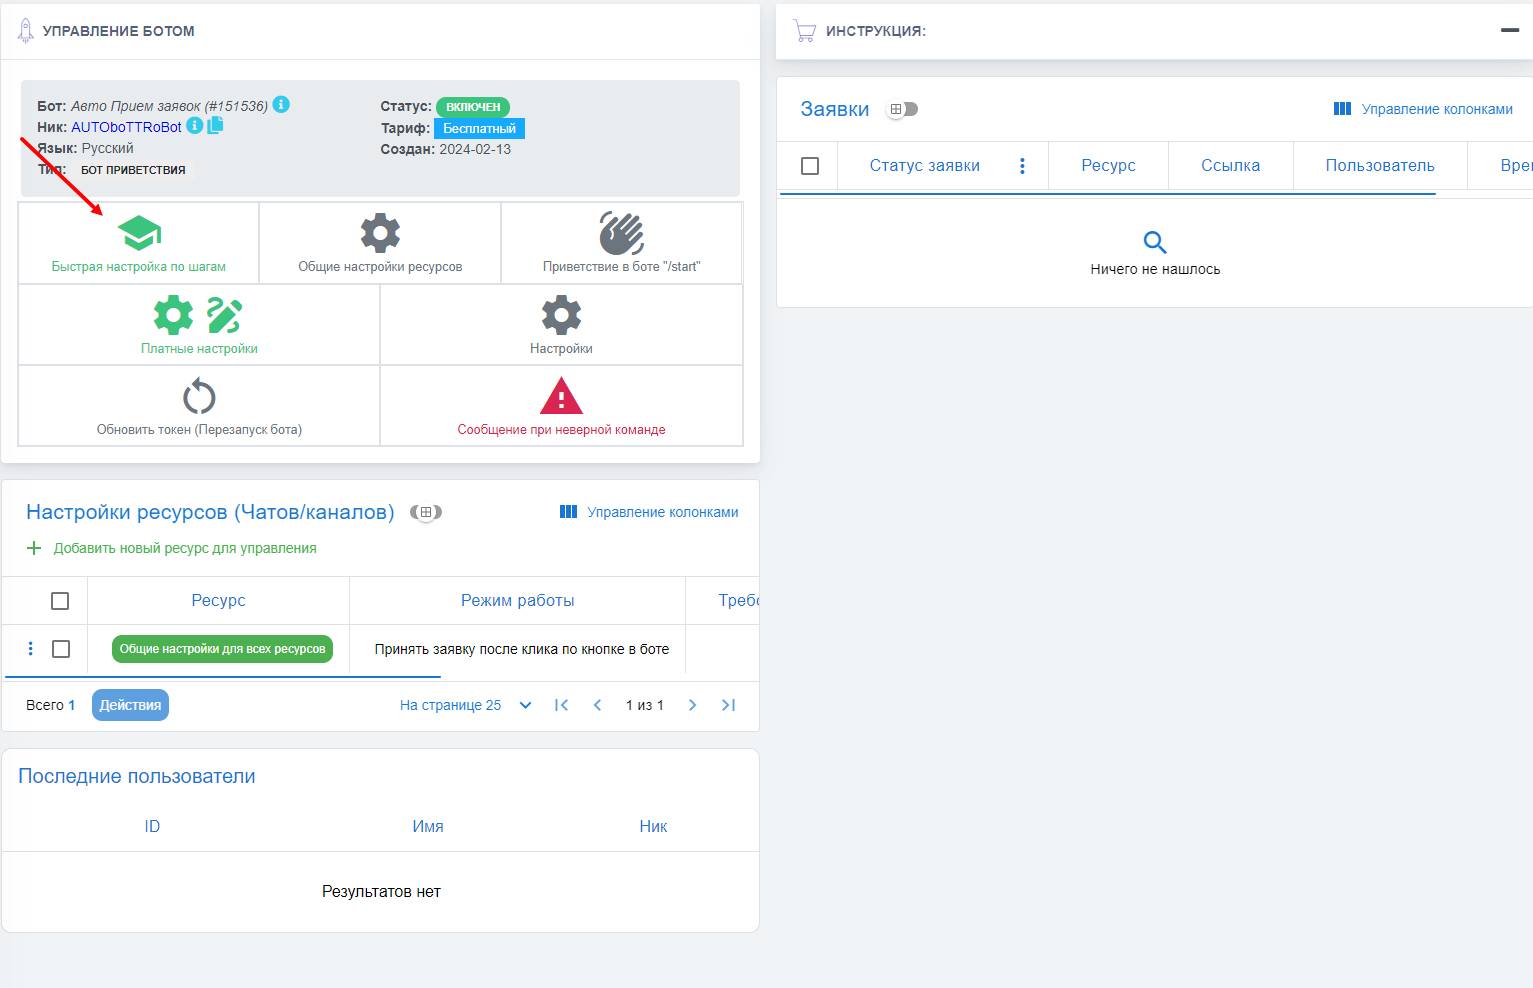 Through the bot's dashboard, you need to click the "Step-by-step quick setup" button and follow the instructions
 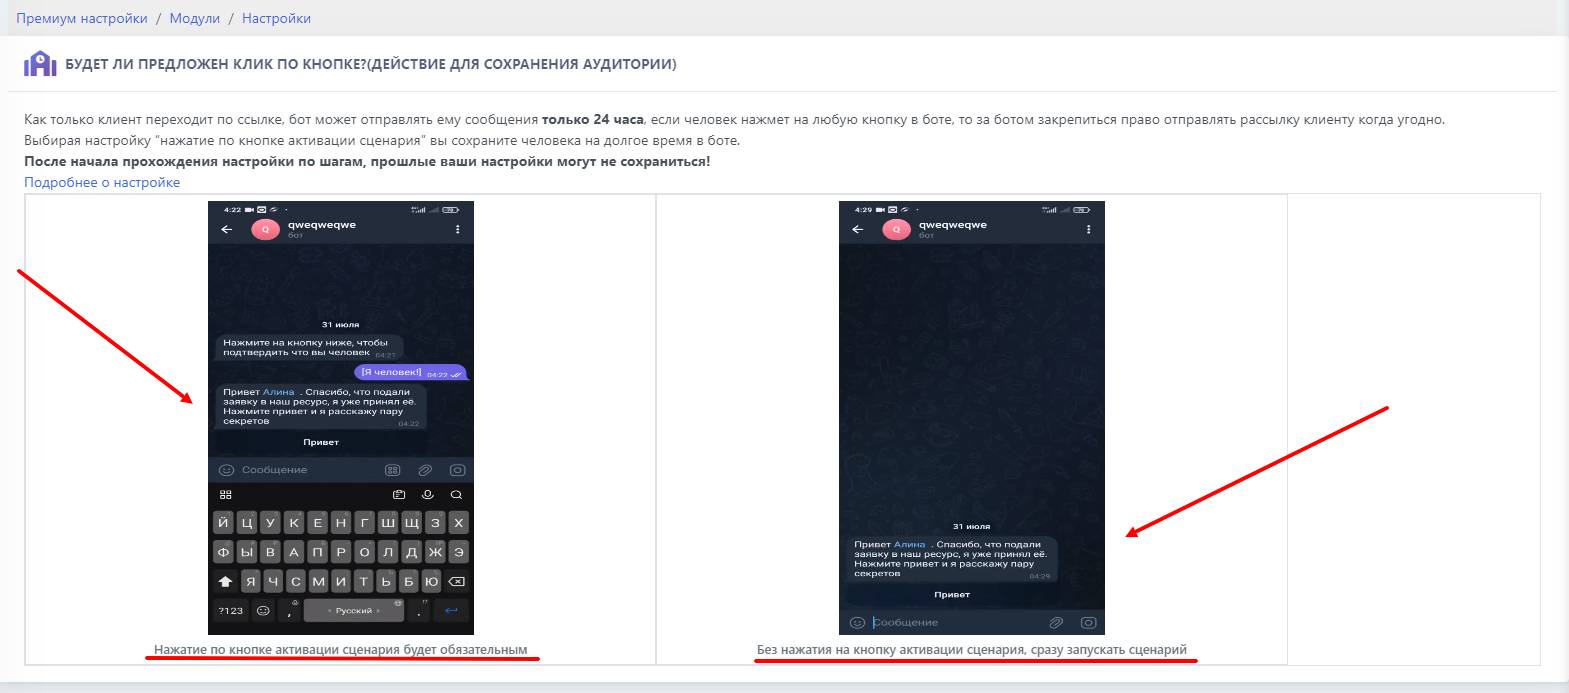 As soon as a user follows the link, the bot can send messages to them for only 24 hours. If the person clicks any button in the bot, the bot will retain the right to send broadcasts to the client at any time. By selecting the “button click to activate the scenario” setting, you will keep the person in the bot for a long time; that is, after clicking the button, the bot will perform the action you specified — approve the user to the channel/decline the request, or ignore it. After clicking this button, the potential client will be added to your database, which will allow you to send broadcasts.
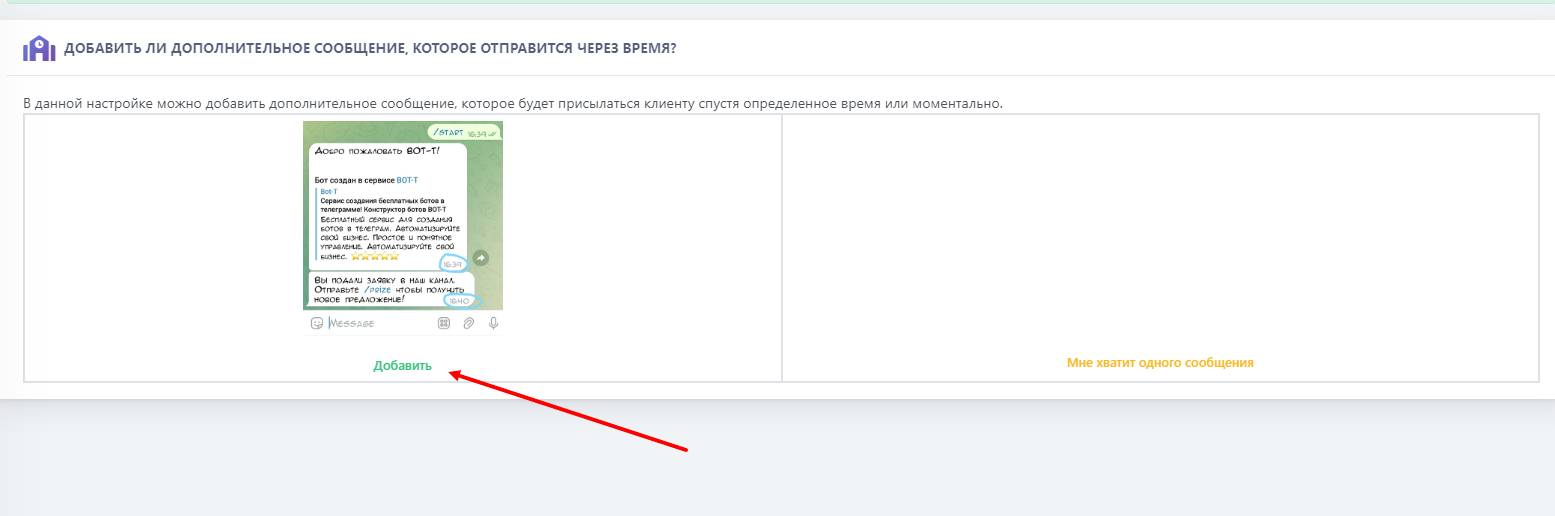 If you add this message, it will be sent to the user after the time you specify. For example, this message can be used if the user ignored the first one, or to attach additional information to this message.
 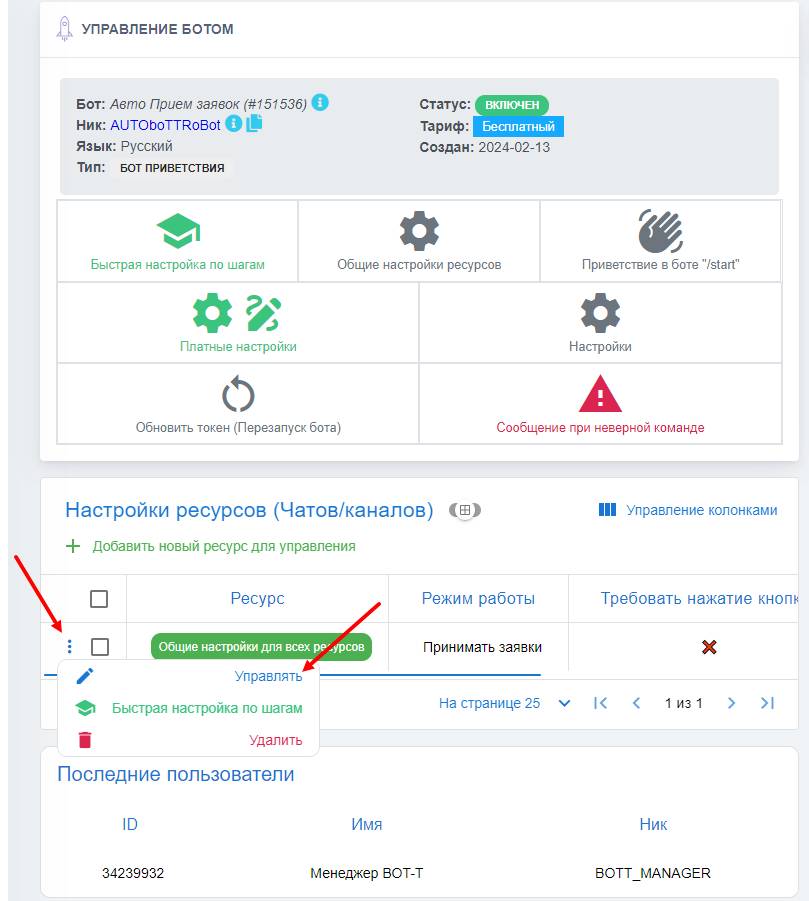 After successful quick setup of the auto-accept bot for applications, we move on to the next stage - configuring the bot scenarios, adding the texts that the bot will send after submitting a request to join the channel.
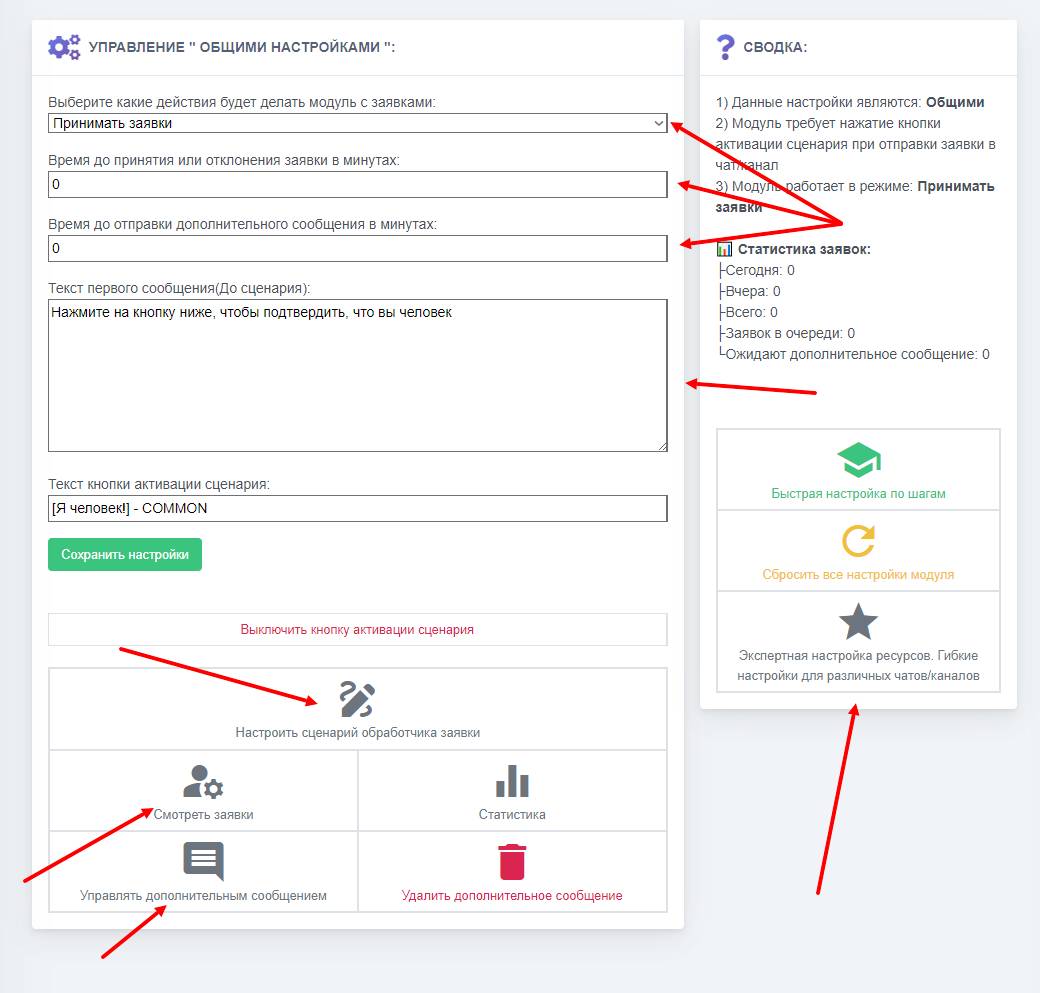 In this setting, the following parameters are configured:
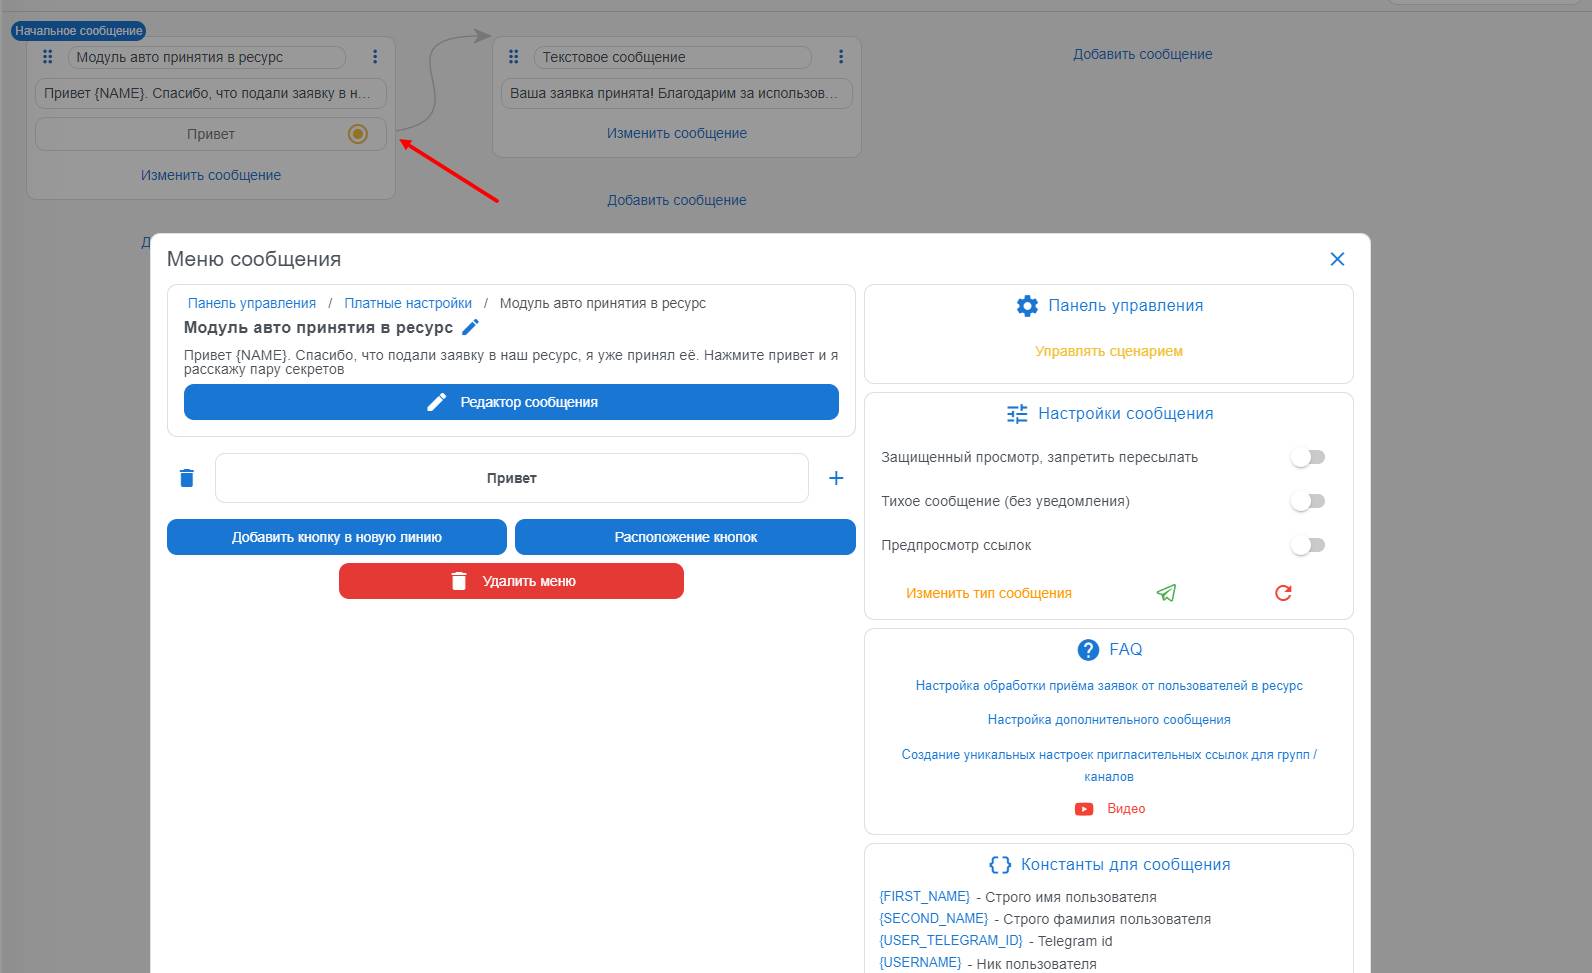 In this block, you can configure the message that the bot sends after a subscription, as well as the scenario, and add a link to the next message. These messages can be used, for example, for sending advertisements, so there will be no payments in the bot, but you will be able to monetize your content by selling ads without featuring them in the main channel
 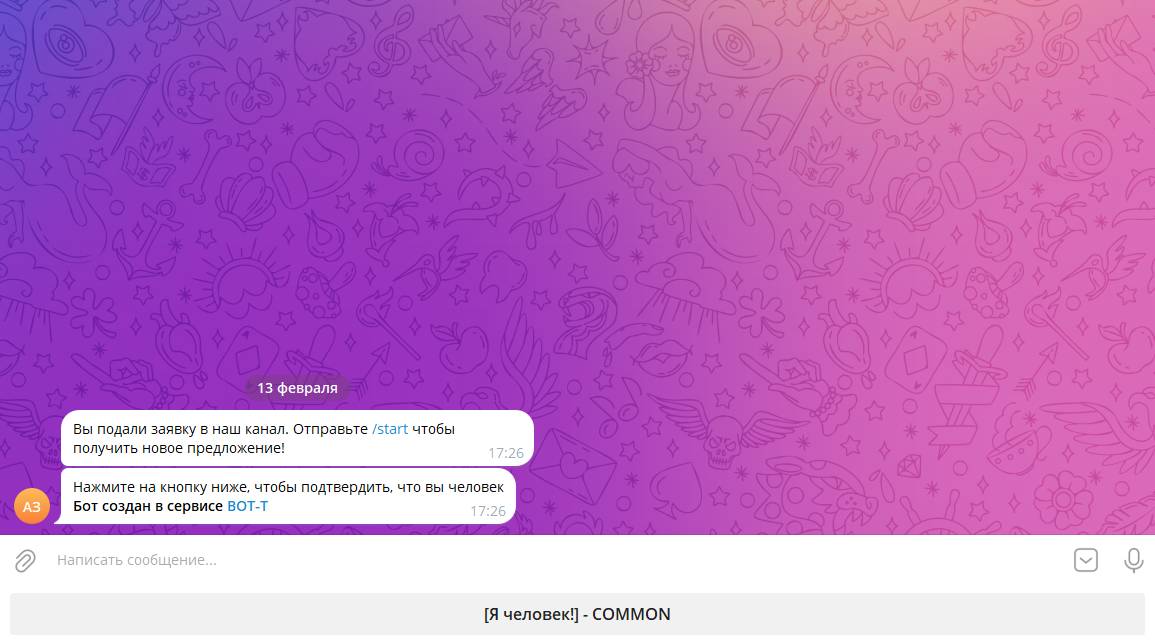 Setup complete!