
 - YooKassa accepts from self-employed individuals.
To connect a payment method via YooKassa (formerly known as Yandex.Checkout), you will need to complete several steps. Please note that the process may change, so it is recommended to check the latest information on the official YooKassa website. As of 2023, the process looks roughly like this:
1. Registration in YooKassa:
- Go to the official YooKassa website and start the registration process by choosing the service package that suits you.
- Fill out the merchant questionnaire, providing all the necessary information about your business.
2. Contract completion:
- After completing the questionnaire and having your data verified by YooKassa staff, you will be offered to conclude a contract. This may be an electronic contract or a contract that needs to be signed on paper, depending on your region and business type.
3. Technical integration with your bot:
We will go over this setup below👇🏻
An example of using YooKassa in @otvetiumbot
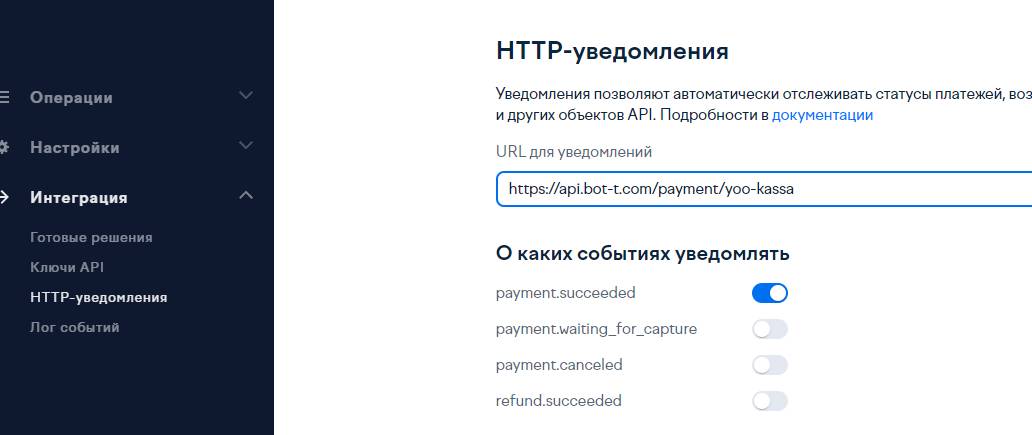 After successfully opening the cash register, you need to enter the notification URL in the integration window on the YooKassa website
 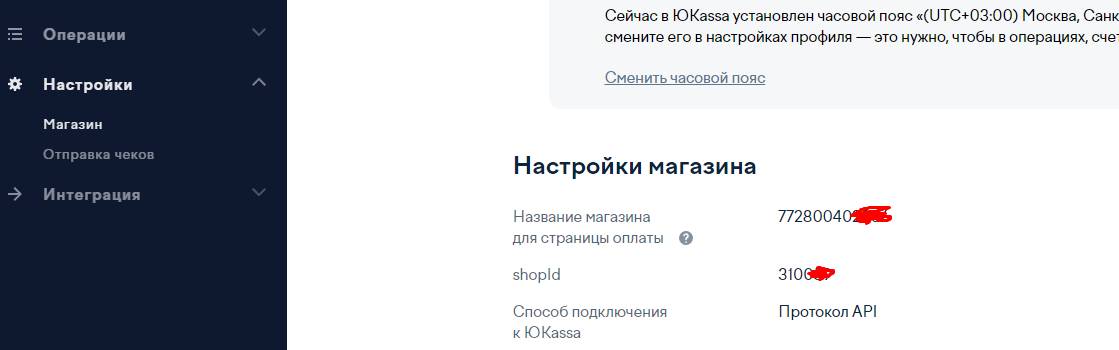 see screenshot
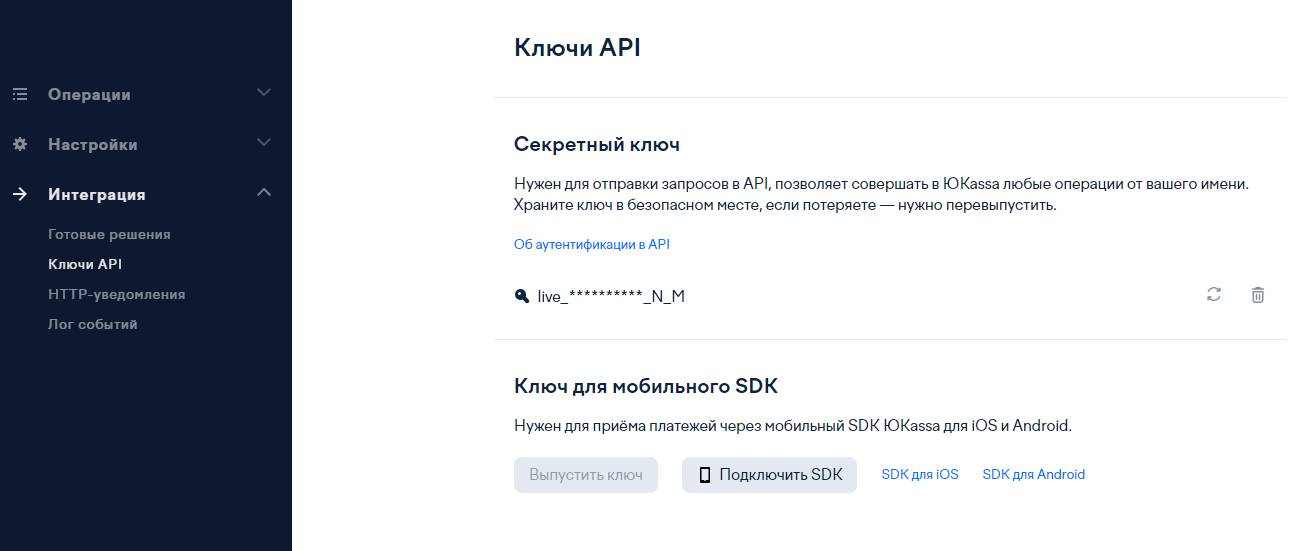 see screenshot.
 yoo kassa works only with enabled receipts! Therefore, if you do not enable them, you will receive such an error, this is done in the tax cabinet.
 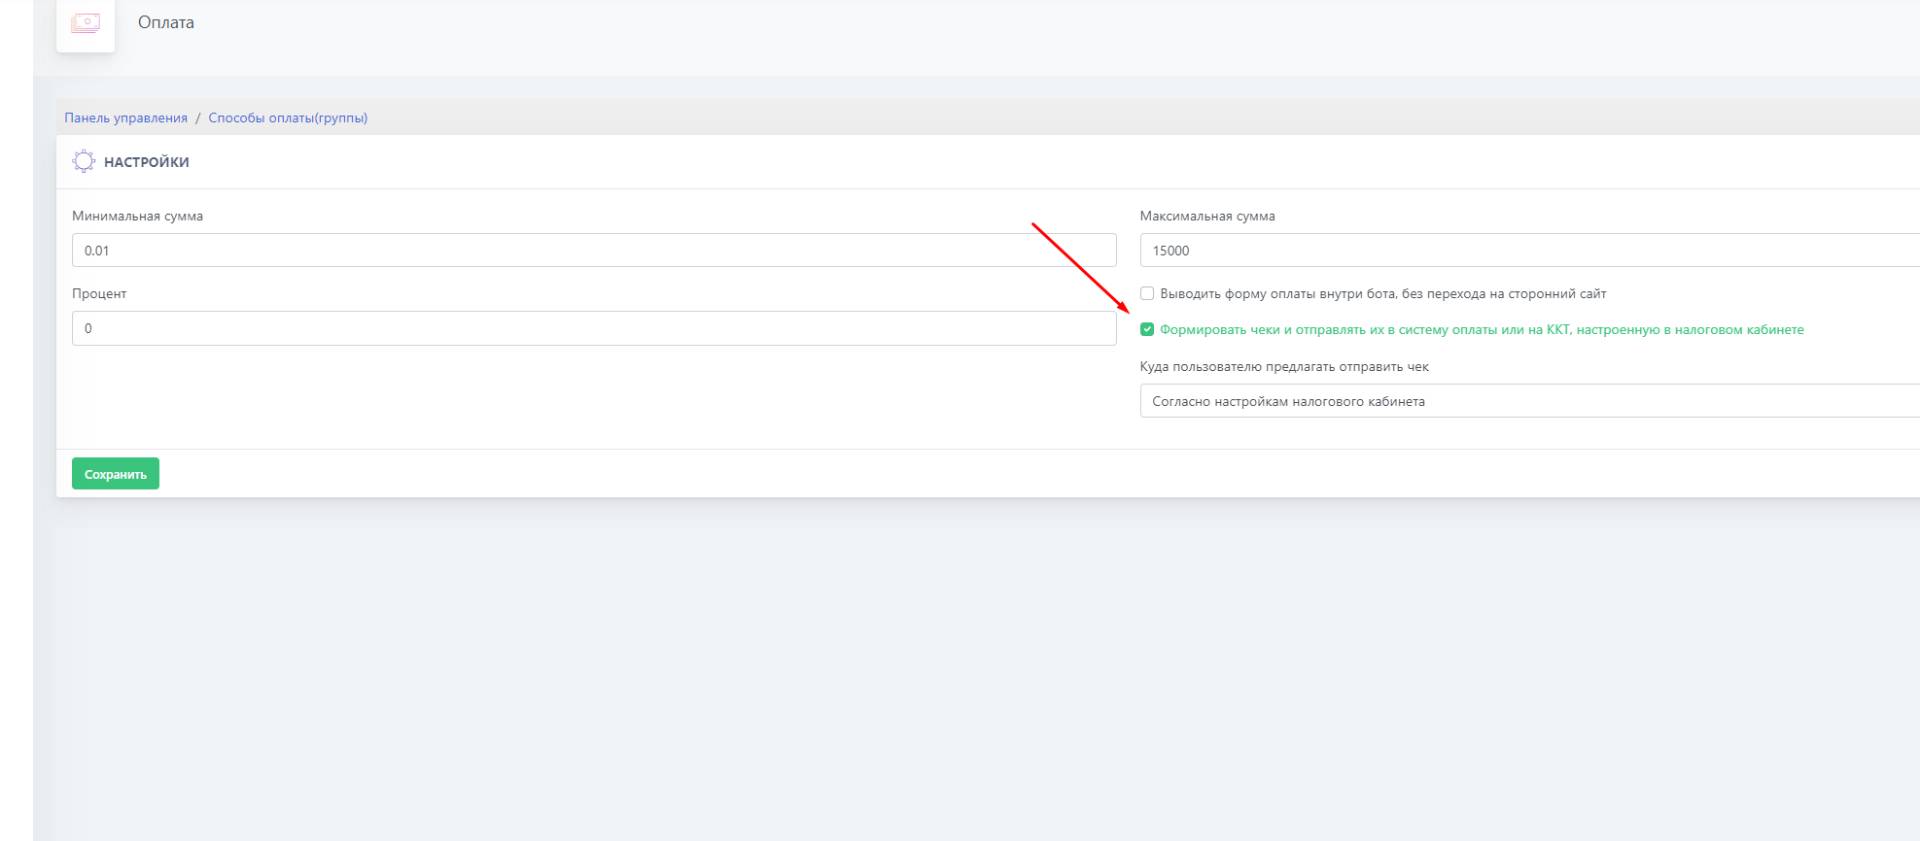 After setting up and activating the tax cabinet, enable the receipt generation mode in the Yookassa payment method.
 When you change the notifications for receipts, be sure to cross-check with the screenshot, as in case of discrepancies, you will need to test the accuracy of payments INSIDE the bot to avoid possible errors.